Saturday, June 19, 2010

A Labor of Love


Our garden transformation project has been documented here in this blog as a way to showcase the awesome way that the Inside-Out Design team of Andrea, Michael, and George helped us transform an overgrown yard and post-construction site into a tranquil woodland garden and formal patio.

Most of the before and after photos that I have posted in the various sections of the blog show the before as it looked back in April when we were just starting the project. However I want to show some before and after of how our yard looked before we started our construction and how it looks now.

The greatest impact that having Andrea design the garden and hardscape was her extraordinary vision and creativity. It really helpded us take our yard from rather unfinished and unkempt to refined and elegant. It took almost an entire year to get from the beginning to where we are now but the results have been amazing! It was truly a labor of love for Dwight and me!

Before ~ The Garage Area was poorly defined where the driveway and yard came together.


After ~ the new 3 car garage is awesome and stately plus it gives us privacy in the back of the house and yard that we didn't have before.


Now visitors can enter the yard from behind the new garage and this is what they will see. It is a lovely way to invite people into our yard.


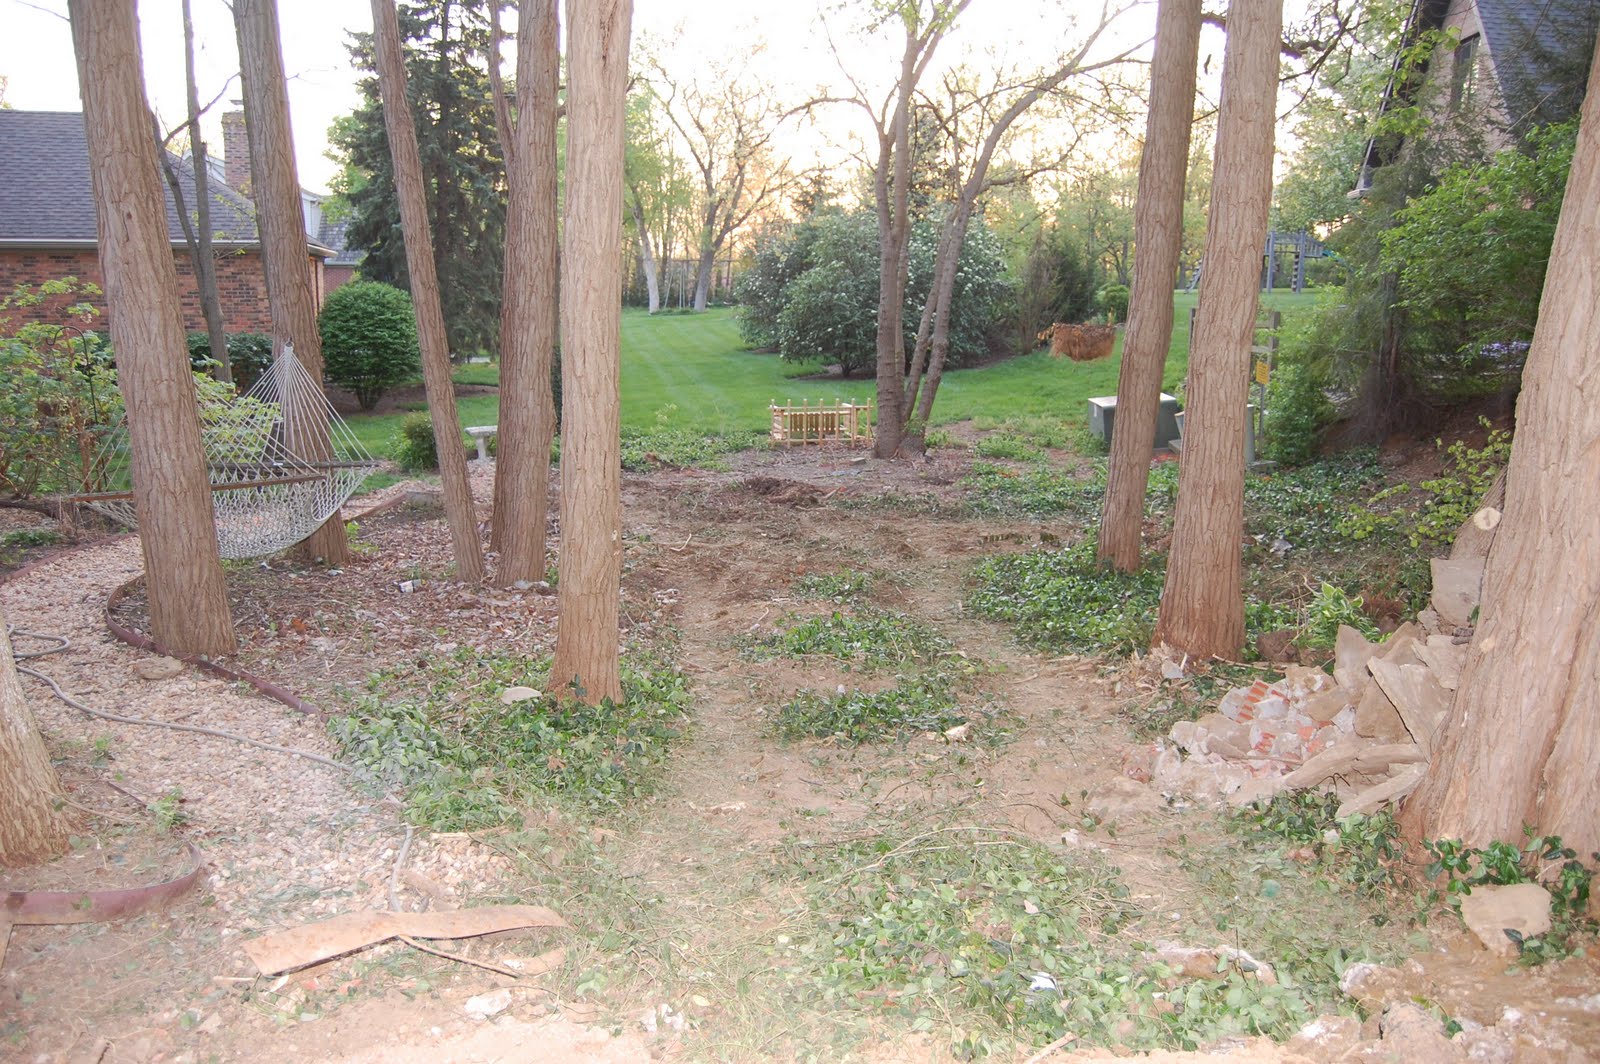
Before ~ our yard was unkempt and the placement of the plants didn't quite work due to poor proportions and random placement. The ground cover had taken over everywhere.


After ~ the hardscape is low maintenance but still interesting due to the circular patterns. We plan to add black iron benches on each side of the circle facing the urn in the middle. The plantings are much more formal and elegant.


Before ~ There was a beautiful hydrangea right next to the patio but this is the view from the back door. It was too close to the patio which did not allow for any expansion without moving it.


I really did not want to lose the hydrangea because it had been so pretty over the years so we hilled it in during the construction of the hardscape.


I called it the "Lone Hydrangea" because it reminded me of the Lone Cypress in Pebble Beach.


After ~ The hydrangea is now the focal point at the corner of the new garage. It has plenty of room to grow.


Before ~ the back of the house looked like...well... it looked like the back of a house. Nothing special and not very inviting or private.


The new garage construction is about to begin in the above picture and below is how the back yard looked after the new garage was completed. Mud in deep shade where nothing was going to grow.


After ~ the area under the kitchen window is now an interesting little bed but all the rest is hardscape and the fountain area.


How could we not have fun chillaxin with friends or just hanging out with the fam on the back patio? After all the clock on the wall says it's 5 o'clock somewhere!


Dwight and I could not be happier with the results ~ we achieved exactly what we wanted which is a welcoming space which will continue to grow and flourish with minimal maintenance. If you have a chance to look at the before and after pictures of each separate area, you will surely be amazed at what we achieved in a few months!


Well at least I know that Margaritas are always welcoming!

Before and After ~ The Woodland Shade Garden


BEFORE
The Challenge ~ Make this overgrown heavily shaded area with a high tree canopy look like a natural woodland setting with shade-loving hostas, ferns and other perennials.
While the ivy and vinca ground cover was at least green, Dwight felt like it was way too invasive to incorporate into a woodland perennial garden and Andrea agreed.


Needed to find a way to hide the utility boxes at the back of the property too.


The Process ~ This was a very large project which included clearing out the ground cover and old shrubbery and having some of the trees trimmed up to remove dead growth.


The Inside-Out Design crew did all of the clearing and planted the shrubbery which will hopefully grow up and hide the utility boxes. We had saved all of the hostas from before so Dwight planted those throughout the area among the ferns and astilbe that Andrea had included in the shade garden.


AFTER
The Result ~ A beautiful shade garden with a natural woodland feel.
The wooden arbor was positioned to help hide the utility boxes and it also ties in with the neighbor's wooden fence. We used natural stone pavers as stepping stones leading to the arbor.


The Japanese Maple is a focal point at the entrance to the shade garden.


Here's the blue hosta that was moved from the bed it had outgrown. It looks in much better proportion here among the large trees.


We hung impatiens baskets from the trees to add color among the cool shade and positioned them so that the uplights spotlight them at night.


The results exceeded our expectations and will continue to delight us as the hydrangeas, ferns, astilbe and hostas grow to fill the area with shades of green, white, and deep pink.

Before and After ~ The Rain Garden


Andrea had designed a rain garden in the original drawings but not being exactly sure what a rain garden was, we initially elected to leave it out. But after more discussion about the runoff from the large expanse of patio pavers we were installing it was determined that the rain garden would probably be one of the most functional features we could include in our plan. Amazingly enough, it is one of our favorite features as well.

The Challenge ~ Allow for adequate drainge of rainwater from the extensive hardscape area as well as rain runoff from our large expanse of roof on the main house and the three car garage roof that we had recently built. All of the gutters on the back of the house and the addition were now being directed to the area below the patio which once was a wooded area that had always had a path of water drainage right thru the middle. Anything we tried to plant there would be in danger of being swept away with the rainwater drainage.

Before


The Process ~ A deep hole was dug in order to catch the rain water drainoff in a sort of basin.


Our favorite feature of all is the rock drainage well that George, one of our landscapers with Inside-Out Design, conceived and built on the fly. We had a bunch of rocks piled up in the corner of our yard from where we had put in a dry stack wall many years ago. George came up with the idea to incorporate the rocks into a natural looking pathway that would allow the water to drain right into the rain garden giving the area some interest and breaking up the large expanse of area. George really rocks (no pun intended)!!!


After ~ You can see the rain garden after a rain. It was planted with water-loving plants such as Japanese Iris and Horsetails. I am also on the look out for other interesting rain garden plants I can add a few at a time.


Here it is when it is dry ~ it is so incredibly cool-looking and functional. We are so absolutely thrilled that we had it installed by our phenomenal landscape design team from Inside-Out Design.

The rain garden is one of our favorite features and it may save us some money in the near future as the city of Lexington is considering taxing residents for rainwater recovery depending upon how much hardscape they have on their property. But having a rain garden makes you exempt. Gotta love that! Beautiful and good for the environment too.

Five Tons of Rock And You've Got Yourself a Patio


The Challenge ~ Create a circular patio area at the bottom of the pea gravel pathway that leads to nowhere. Andrea's design plan had a circular paver patio that mirrored the circles on the patio above. She said we needed something to anchor the lower part of the garden and the circular patio would be a nice place to put a few sun loungers. The problem was that the budget wasn't going to allow for a "love to have but don't have to have" luxury like a sun lounger patio made of pavers.

So....we decided that a circular pea gravel patio would fit the bill just fine and the price was right - $45 a ton for pea gravel and free labor (Dwight, Bruce and myself).

The Process ~ Dwight and I laid out the circular bed and bordered it with garden edging. Then he laid the weed repellant liner and staked it.

Next the real fun began - On the Friday before Labor Day 5 tons of pea gravel were delivered and dumped on the driveway in front of the house. I really wish I had taken a picture of the pile o' pea gravel or more like the mountain o' pea gravel. As Dwight started filling the wheelbarrel with a shovelful of pea gravel and it wasn't making a dent at all I could not imagine that we would ever use all the pea gravel. On top of it, they were coming to put in our new driveway on the Tuesday after Labor Day so we had 3 days to move the 5 tons of pea gravel wheelbarrel by wheel barrel from the driveway all the way across the front of the house and around to the back. It took 13 shovelfuls to fill the wheelbarrel and I am not sure how many trips were made around that path from front to back but it was a lot.

For three days Dwight shoveled, wheeled and dumped the pea gravel while Bruce and I used steel rakes to smooth it out over the circular area so that it was 4 inches deep everywhere and Charlie tested it out for us.


The Result ~
A beautiful pea gravel patio which is just as pretty as we imagined it could be. Karen and Kevin gave us a cute little bistro table and chair set which is just perfect for the spot.


We bordered it with hostas that our neighbor Helen graciously let us have out of her yard. Here is a picture of one of the wheelbarrels of hostas that Helen gave us.


While Charlie supervised, Dwight planted hostas, day lillies and grasses around the border to soften the area and make it appear as if it were tucked into a garden.


For more color I added a few pots with a Hibiscus plant a well as some Rosemary and flowers and a beautiful hanging basket that Dwight's parents gave us. Solar lanterns on hooks around the edges are an added touch that I really like. For more screening I would like to put a Crepe Myrtle or similar tree in a large planter.

This area will have many functions from being a delightul seating area with the bistro table for an impromptu dinner or brunch to a sunning spot with a few sun loungers for the middle of the summer months and in the fall we plan to put the fire pit down there.